Editing a camera path
The editor: live view with control overlay, "Capture point" and the list of waypoints.
Open the editor by tapping an already selected tile again.
The editor consists of three parts:
- the live view with its control overlay at the top,
- below it the "Capture point" button,
- below that the list of waypoints.
At the very bottom: Preview (runs the route without recording, for checking).
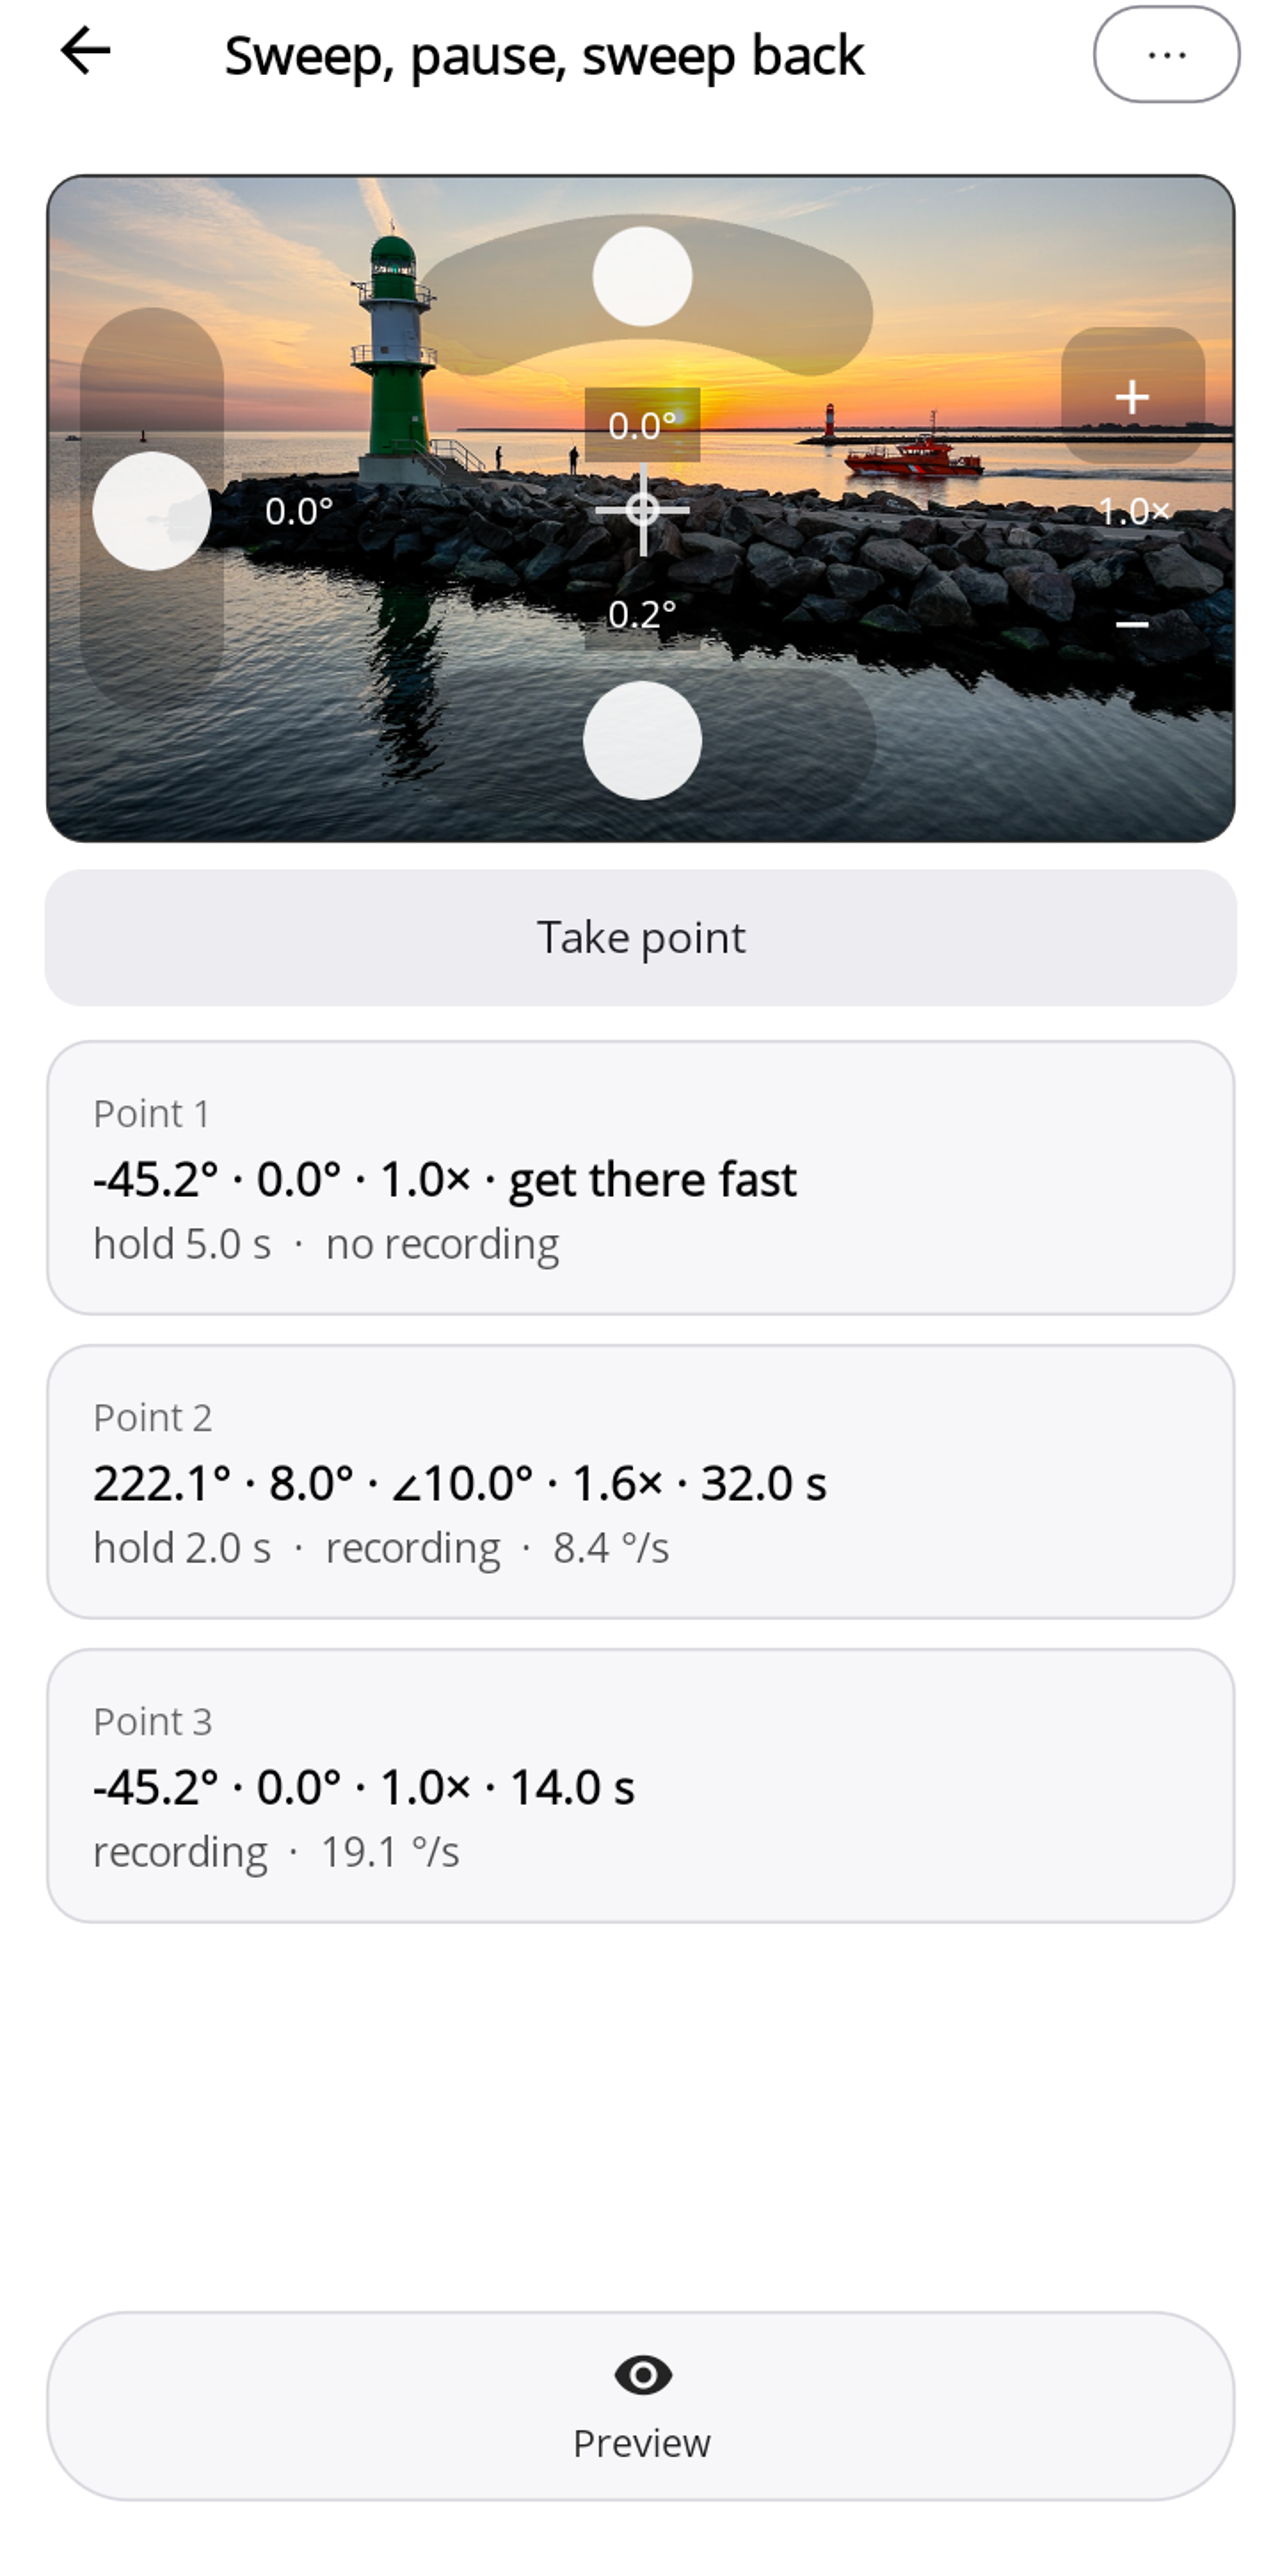
Framing the picture (via live view)
You frame the desired view directly in the live image:
- Pan: the horizontal joystick at the bottom turns the camera left/right.
- Roll: the arc at the top tilts the horizon: drag right for clockwise, left for counter-clockwise.
- Tilt: the vertical joystick on the left tilts up/down.
- Zoom: the +/− buttons on the right (press and hold) zoom in/out. The current factor is shown below (e.g. "2.0×").
- Centre: tapping the crosshair in the middle of the image points the camera forward/level.
The current pan, tilt, roll and zoom values are displayed next to the joysticks.
Adding a waypoint
When the view is right, tap "Capture point". The current pan, tilt, roll and zoom level are added to the list as a new waypoint. This is how you string together the route, point by point.
Fine-tuning a waypoint (numerically)
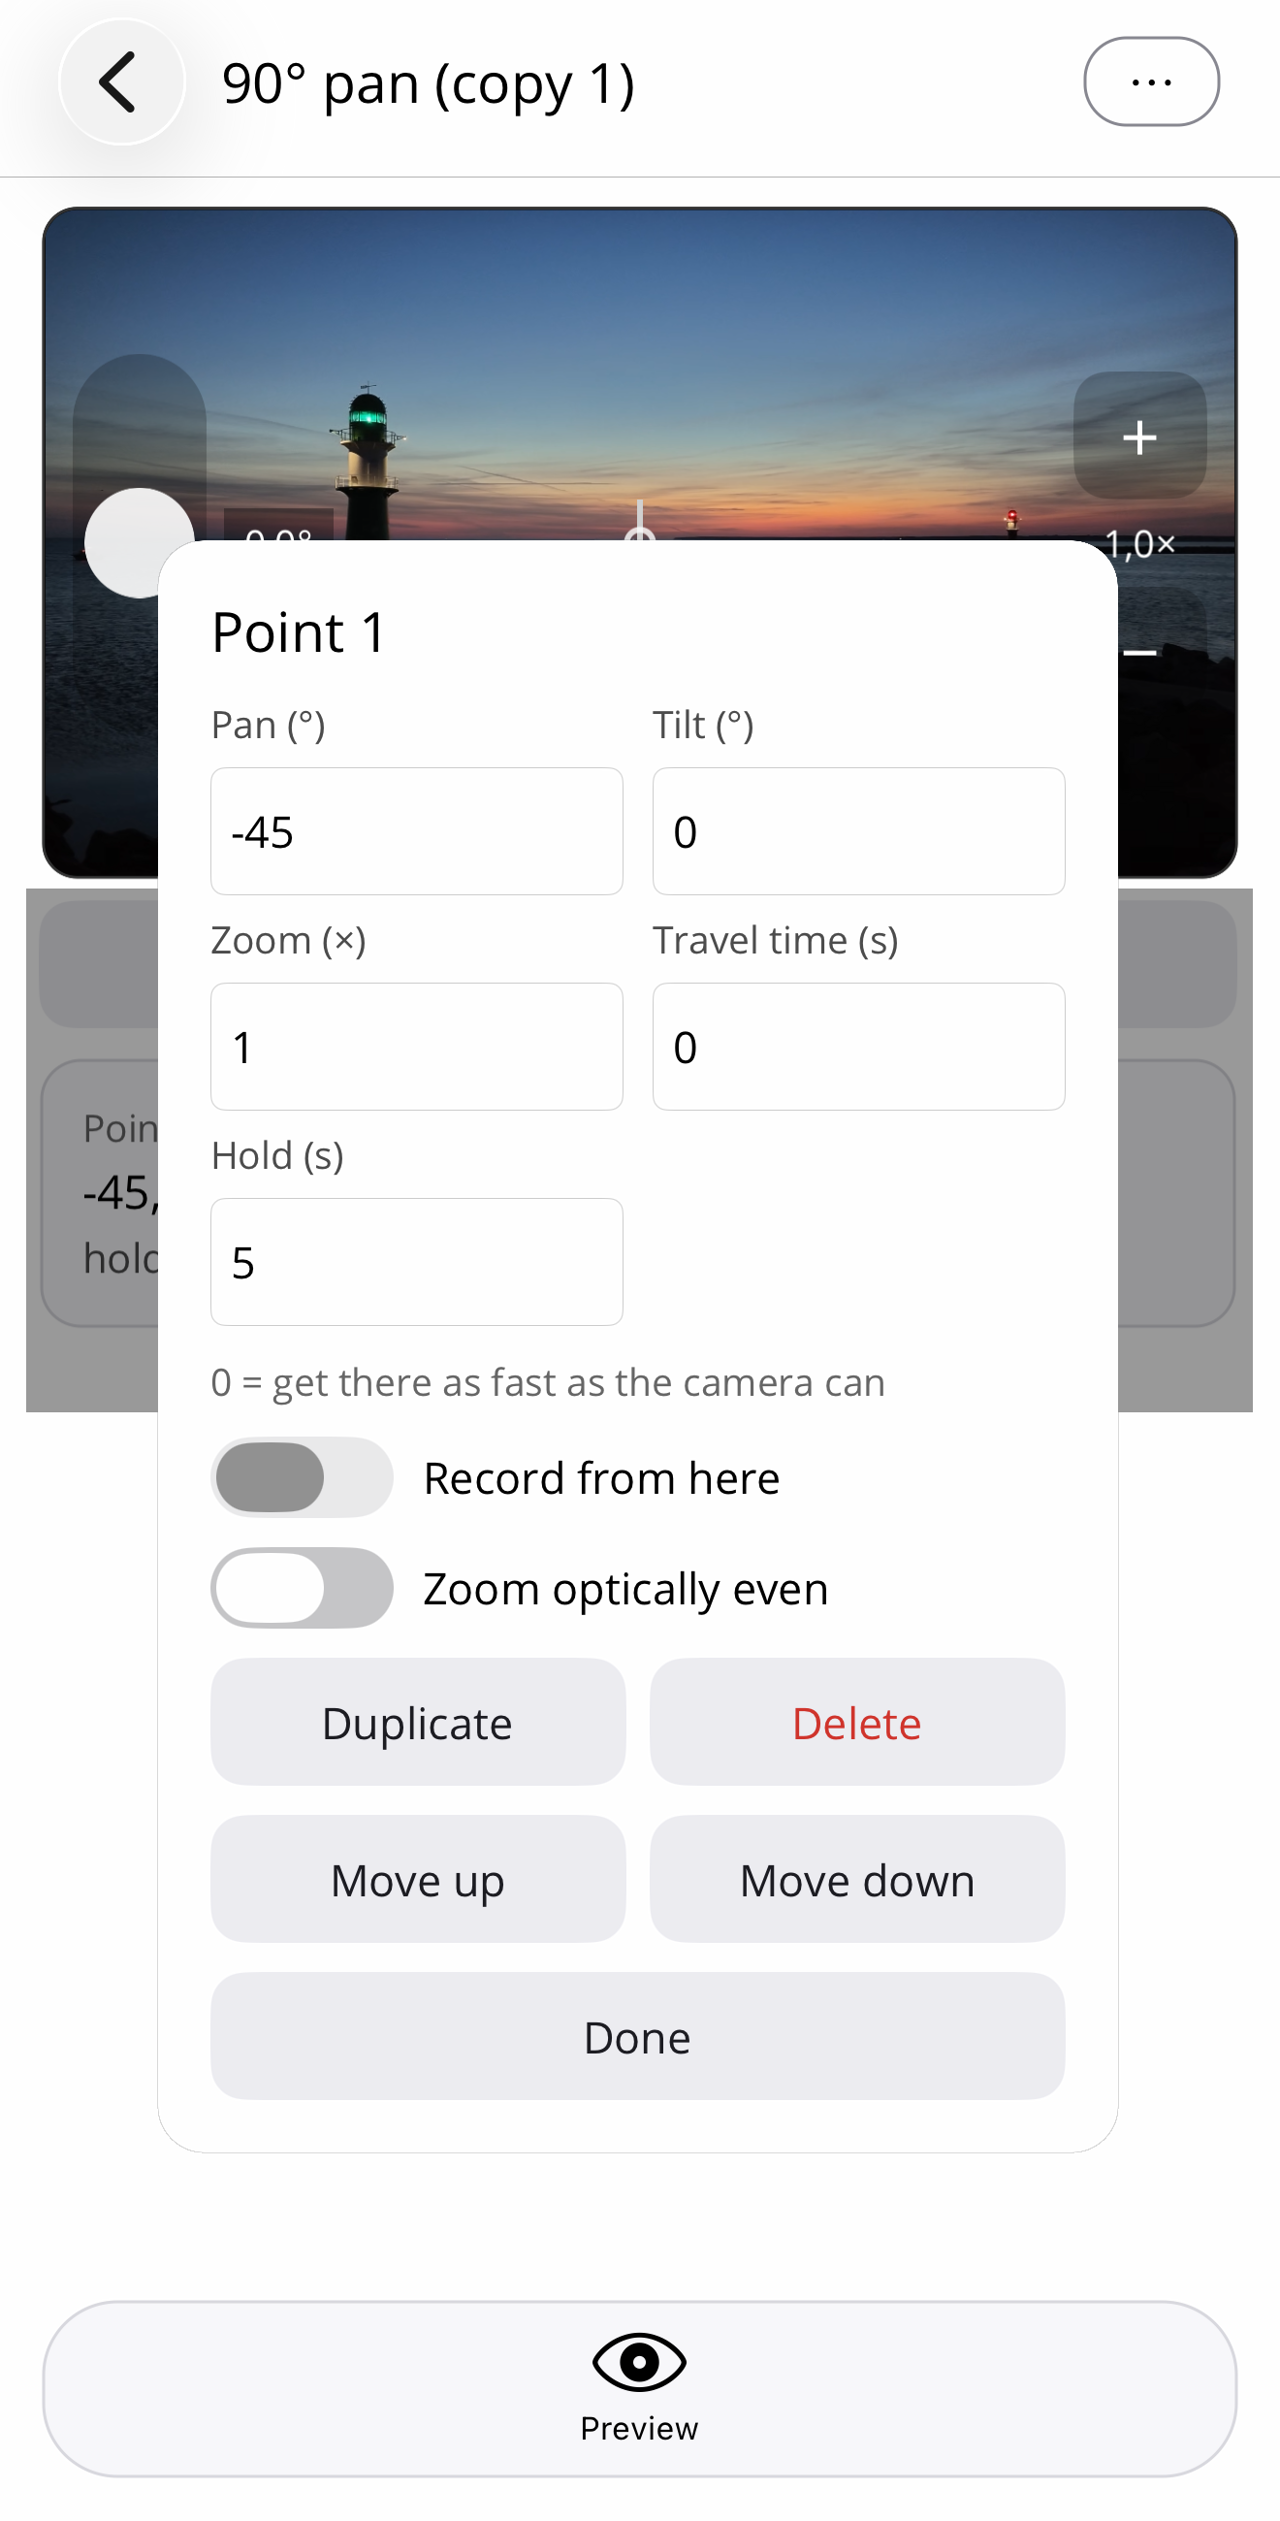
Tap a waypoint in the list, and the edit card with numeric fields opens. Every value can be entered or adjusted precisely here:
- Pan (degrees) · Tilt (degrees) · Roll (degrees)
- Zoom (factor) · Travel time (seconds)
- Hold time (seconds)
- Switches for Record (record from here on) and Optically even zoom
- Loop: "Back to … · Repetitions" (see below)
- Duplicate, Delete, and ↑/↓ for re-ordering.
For hyperlapse and slow motion, Pathset shows for each point and for the whole move how long the finished video will be, e.g. "450 s → 15 s in the video" at hyperlapse ×30.
Loop
Every waypoint has the row "Back to … · Repetitions (0–999)". Pick an earlier point and a count: after this point the camera moves back to the chosen point and repeats the stretch up to here that many times. 0 repetitions means no loop. A move has one loop; setting a new one on another point replaces the old one.
The jump back takes as long as the duration entered at the target point. Hold times and "Record from here" apply in every round. The total duration on the tile and in the status line includes all rounds.
Example: a slow pan back and forth for an hour
| Point | Pan | Duration | Loop |
|---|---|---|---|
| 1 | −20° | 0 s (approach) | – |
| 2 | +20° | 120 s | – |
| 3 | −20° | 120 s | back to point 2, 14× |
The camera moves quickly to point 1, pans right in 120 s, back in 120 s and repeats that 14 times: 15 rounds in all, one hour. The three points are deliberate: the loop jumps back to point 2, not to point 1. Point 1 has a duration of 0 s, the fast approach at the start; jumping back there would snap the camera back just as fast. Pathset warns about this. The fix is a separate point for the way back, as above, or a duration at point 1.
The preview runs the loop with one repetition, enough to check the jump back without waiting an hour. While the move plays, the status line also shows the round, for example "↻ 4/15".
Below the waypoint, Pathset warns if the loop jumps back to a point with a duration of 0 s (see the example), if the loop points at the same waypoint (then it only repeats the hold time), if the target is invalid, or if a second loop would be set.
The recording card
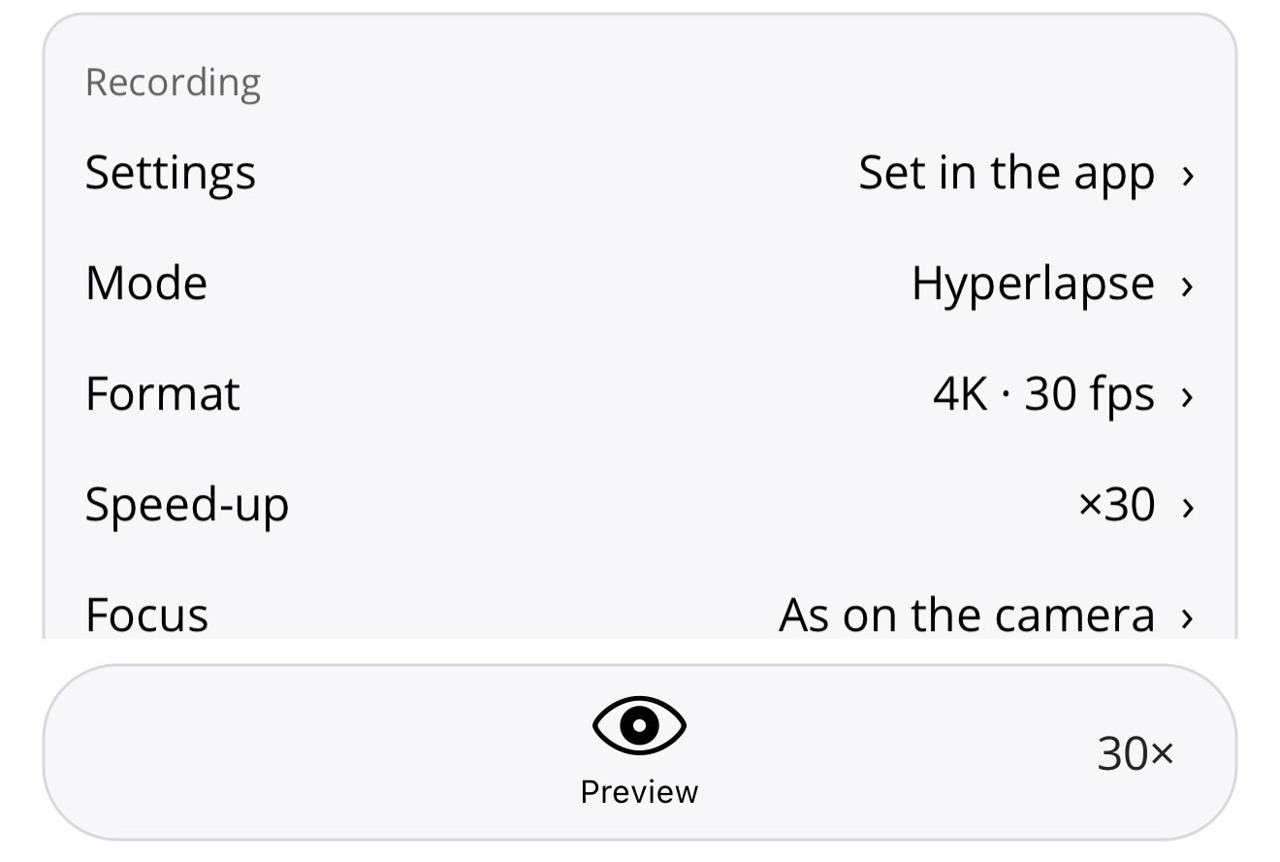
Below the waypoints you find the Recording card. Tap any row to change it. The rows below apply to the Osmo Pocket; on the Insta360 Luna Ultra the card offers the modes Timelapse and Hyperlapse (TimeShift) instead — see the two sections that follow.
- Settings: "As set on the camera" records the way the camera is currently set up. "Set in the app" saves the following settings with the move.
- Mode: video, slow motion or hyperlapse.
- Format: resolution and frame rate, with the slow-motion factor for slow motion (e.g. "4K · 120 fps · 4×"). "As on the camera" leaves the format unchanged. Only formats your camera supports are offered.
- Speed-up (hyperlapse only): auto or ×2 to ×30.
- Focus: "As on the camera", AF-S (focus once) or AF-C (continuous). Sub-modes of AF-C, such as subject tracking, are set on the camera.
Pathset applies the settings only when you start with recording, and afterwards returns the camera to the mode it was in before. The preview in the editor does not change the camera.
Timelapse (Luna Ultra)
Important: Luna timelapse is currently experimental.
Pathset tells the camera the next angle for every frame. During slow pans the Luna Ultra does not always carry out these small steps exactly — sometimes a little short, sometimes a little too far. At regular intervals the camera corrects its position on its own, which can show up as a small jolt in the finished video. How strong this is varies from recording to recording, and Pathset currently cannot influence it. We are working on it.
If you try the timelapse, we would really appreciate your feedback — ideally with interval, duration and pan distance — at info@nogetec.de.
In the recording card of a move choose "Set in the app", then "Timelapse" under "Mode". Four rows appear:
- "Interval" — time between two photos: 0.5 / 1 / 2 / 3 / 4 / 5 / 10 / 15 / 30 / 60 s. The video plays at 30 frames per second, so with a 1 s interval it runs 30 times faster than real time, with 2 s 60 times. The duration of the move sets the clip length (example: a 4 min move at 1 s = 240 photos = 8 s of video).
- "Exposure" — "Automatic", "180° rule" or "Manual" (see below).
- "Exposure compensation" — −4 to +4 EV in half steps, with "Automatic" and the "180° rule" (with "Manual" the row is hidden). For bright scenes or night shots with light sources usually −1 to −3 EV so the lights don't blow out.
- "Live view" — "off – every frame kept" (default) or "on – exposure and framing visible". The camera's live view is made of the real exposures: if the app watches along during the timelapse, photos get lost with long exposure times (in low light, and at the 0.5 s interval almost always). Without live view every photo is kept. Before the first timelapse Pathset therefore asks once "Live view in the timelapse?" ("Without live view" / "With live view") and remembers the answer; this row changes it at any time. With the exposure set to the "180° rule" the row is hidden and the live view always stays off. While a recording runs without live view, the live view frame only shows the note "Live view off during the timelapse"; afterwards the picture returns by itself. With "Manual" the live view also stays off during the recording. As for all timelapses: currently experimental, see the note above.
The gimbal follows the points of the move as usual; between two photos Pathset sets the camera exactly to the next position of the path (in two small steps per interval). The zoom follows the points smoothly — a slow zoom-in over minutes is exactly what this mode does best.
Where the camera holds or reverses, it eases in and out — about half a second in the finished clip; in between the speed stays constant.
At the end the camera stands within a few tenths of a degree of the point, and the motion from photo to photo is even. Pathset sets the exposure at the start and restores it after the recording; the timelapse duration set on the camera before stays as it was.
After the end the camera keeps saving the recording for about two to two and a half intervals (just over a minute at a 30 s interval). Pathset waits for this and shows "Camera is saving the recording (approx. … s)" in the status line; only then is the camera ready for the next move.
180° rule
In film the shutter is open for about half of each frame — motion then looks natural, with slight blur instead of choppy stills. Pathset applies this to the timelapse:
As for all timelapses: currently experimental, see the note above.
- Shutter = half the interval, with no limit up to 30 s (at a 60 s interval): at a 20 s interval every photo is therefore exposed for 10 s — enough for night skies and light trails. The camera sets the ISO automatically, and the exposure compensation still applies.
- The gimbal keeps moving smoothly during the exposure — that creates the motion blur in every photo.
- The live view is off during the recording — always with the 180° rule, regardless of the "Live view" row (with live view the Luna drops photos on long exposures). It comes back by itself afterwards.
- In daylight and bright rooms this needs an ND filter. Half a second or more is clearly overexposed even at the lowest ISO and −4 EV — the 180° rule is meant for dusk, night, or with an ND filter.
Exposure "Manual"
For stars, aurora and night shots where you want to set the exposure yourself. Two rows appear:
As for all timelapses: currently experimental, see the note above.
- "Shutter" — 1/1000 s to 30 s. Only times up to half the interval are offered: up to that point the camera keeps its rhythm; longer times would make the gaps between photos irregular. If you shorten the interval later, Pathset shortens the shutter accordingly at the start.
- "ISO up to" — "Automatic (up to 6400)" or a limit of 3200 / 1600 / 800 / 400. The camera picks the ISO itself but never goes above it. Tip: rather expose twice as long and halve the ISO limit — that gives less noise.
Brightness is set by shutter and ISO limit; there is no exposure compensation here (the row is hidden). The live view is always off during the recording.
TimeShift (Luna Ultra)
For the Luna's hyperlapse, choose the mode "Hyperlapse" in the recording card. Set the speed (×10 … ×60, Auto) on the camera and the same value in the "Rate" row in Pathset — the app can't change it. The zoom is fixed for the whole recording (Luna Ultra: 1× or 3×).
After the recording starts the camera stands still for 15 s: that's how long the Luna needs to set up its image stabilization; the picture still drifts a little during that time. Trim the start in editing. Then Pathset moves along the path in small, even steps; the camera ends exactly at the point.
Smaller frame. TimeShift stabilizes electronically and crops a margin for that: the video shows roughly one sixth less than the normal picture (factor ~1.2). So that you see while planning what will be in the video, Pathset draws a frame around the TimeShift crop in the live view whenever "Hyperlapse" is selected and a Luna is connected. Line up your points with the frame, not with the full live view.
Stabilization drift. Even when the gimbal stands exactly at the point, the stabilization can shift the crop by about 1° over the course of the move, always in the same direction. That's the camera, not the move. Tip: if something important sits at the edge, set the points about 1° further in, or make the pan about 1° smaller.
Preview and preview speed
To the right of Preview you choose the speed: real time, like the video (hyperlapse with a fixed speed-up) or 10×, 50×, 100×. This lets you watch a long move in a few seconds. Nothing is saved. Where the move zooms, the preview takes longer because the zoom cannot go faster.